Overview
1. Getting Started
Requirements
- •Unity 2022.3.62f3+ (LTS recommended, also supports Unity 6)
- •Universal Render Pipeline (URP) — PileGen's shader requires URP
Installation
- •Import the PileGen package from the Asset Store
- •The package installs to
Assets/HLS/PileGen/ - •No additional setup required — all dependencies are self-contained
Folder Structure
Assets/HLS/PileGen/
├── Data/              # Built-in presets, lathe shapes, compound profiles
│   ├── CompoundShapes/
│   ├── LatheShapes/
│   ├── Presets/       # 30+ ready-to-use pile profiles
│   └── ShapePresets/
├── Documentation/     # This handbook
├── Editor/            # Custom inspectors, tools (editor-only)
├── Materials/         # Pre-configured materials for each preset
├── Runtime/           # Core scripts (generator, profiles, placement)
│   └── Generation/    # Mesh generation, deformation, placement solver
├── Samples/           # Demo scene
└── Shaders/           # PileGen_Triplanar shader + includes
2. Your First Pile
Step 1: Create a Generator
Option A — Menu:
GameObject > 3D Object > PileGen > Pile Generator
Option B — Component:
Select any GameObject → Add Component → PileGen/Pile Generator
Option C — Spawn in Scene (fastest): Select a Pile Profile asset → open the Scene Actions section → click Spawn in Scene. This creates a new generator where your Scene View camera is looking, auto-assigns the profile, and generates immediately.
Option D — Quick Preset (no profile needed): Assign a Shape Preset to the Quick Preset slot and click Generate. This bypasses the need for a full PileProfile, ideal for quick testing any single shape.
Step 2: Assign a Profile
A Pile Profile defines what gets generated — shapes, layers, materials, and placement rules.
- •Use a built-in preset: browse
Assets/HLS/PileGen/Data/Presets/ - •Or create your own:
Assets > Create > PileGen > Pile Profile
Drag the profile into the Generator's Profile slot.
Step 3: Generate
Click Generate in the inspector. Pieces appear around the generator's position.
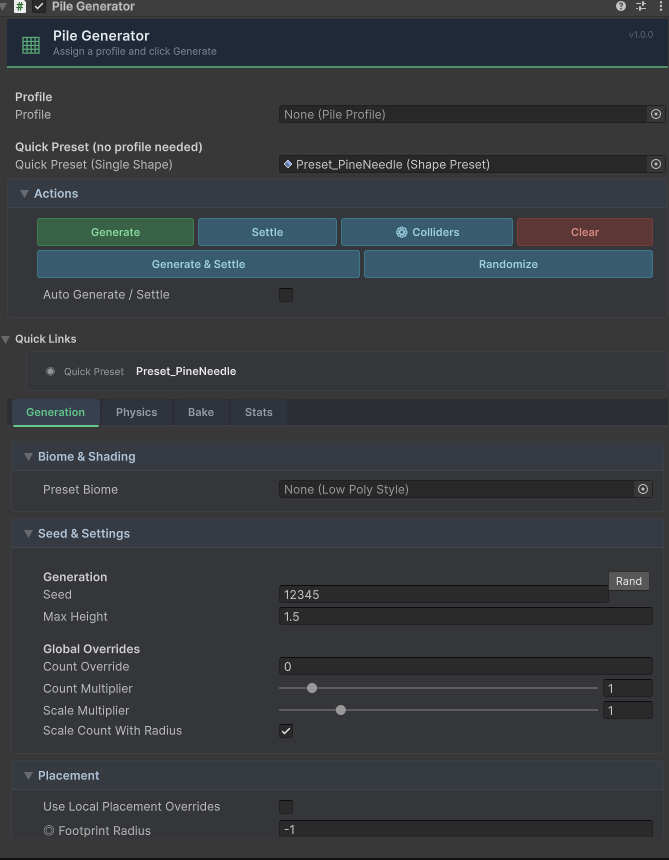 The Pile Generator inspector: Seed & Settings, Placement overrides, and action buttons.
Step 4: Settle (Optional)
Click Settle to run a physics simulation. Pieces fall, collide, and stack naturally.
Step 5: Adjust
- •Change the Seed for different arrangements
- •Click Randomize to roll a random seed and generate immediately
- •Use the Seed History buttons to revisit previous seeds
- •Adjust Radius Override and Max Height to control the pile's footprint
- •Use Count Multiplier and Scale Multiplier as global overrides
Step 6: Bake (Optional)
Open the Bake tab and click Bake Pile to finalize. This combines meshes, generates LODs, and optionally saves a prefab.